Thursday, December 20, 2012

Project Corvo: 03 - More parts, more adjustments, more renders

I've lost count on how many hours spent on modelling the mask so far, or to be correct: Adjusting the parts. Modeling a shape is usually quick, easy and looks good in the end. But modelling a certain specific part, and without exact blue prints, takes a lot more time! Trying to get all the parts as accurate as possible down to every tiny detail and then need to position and remodel them again so they all fit together is a less fun task.
Anyways enjoy the pictures, I took some liberty to make them in high-res render for your viewing pleasure!

In this update, I've added most of the interior parts of the mask and aligned them well together with the skull. The skull itself still needs some realignments to the parts as well so it all can fit together after it has been printed. I've been pondering about how to actually print it as I'm pretty one big print of the whole ting wont work. That means the next step would be to separate the model into parts, then print it and glue them together after, like a model build kit you had when you were a kid. I pray that the printer software allow me to print intersected objects because that is how I've modeled to save time!

Also this might be the last update for a while because of Christmas coming right around the corner, you know, family time etc. So happy holidays to all of you and see you again to the next year! It's going to be a year of printing for sure!

Aaaaalso, should anyone be interested to contact me, you could do so by email to my gmail: mogcaiz(a)gmail.com

-WJ


Happy holidays and a happy new year!

EDIT:  Bonus Holiday Render!

Thursday, December 13, 2012

Project Corvo: 02 - Corvo parts

Small progress update of the 3D model.
Most of the exterior surface of the mask is finished. But I'm going to do a quick overhaul and make sure I got every tiny detail covered once I'm done with all the small mechanical parts of the mask.


I started doing the eye pieces today. I'm really thankful for TME for posting pictures of their mask on Facebook. Especially of how the mask looks like from the inside. Otherwise I would have to rely on in-game screenshots, not the best reference considering they are all in low poly in-game models. But thanks to good high resolution pictures I've managed to nail a lot of small parts down to their accurate detail!

According to a guy who answered an important question to me: Intersected 3D objects shouldn't be a problem to print. We will see if that is true, and if that is, then I'm going to be very happy as that mean I can save a lot of time on how I model my bits and pieces.

- W


Monday, December 10, 2012

PLA. vs ABS - Whats the difference?


Note: I'm updating this post whenever I learn something new about the filaments!
During my conquest for finding the right 3D printer for me, I found myself frequently confronted at a crossroad of choosing which printer should I go for. There is a lot of factors like reliability, quality, speed, cost, service and availability to think about. One factor which usually is not so much mentioned is what kind of material filament it supports.

Most printers supports the two most popular materials: ABS (Acrylonitrile butadienestyrene) and PLA (Polylactic acid), but some printers only supports only of them, and they both recommend it as the preferred material for delivering the best quality prints. So what's the difference, and which one should I choose?

Prior to buying a printer I decided to look up the differences and asked around what the differences were and why it could be a factor when deciding a printer. Here is what I managed to gather.

PLA

  • Bio-degradable, made of renewable resources. Less harm to the environment.
  • Softens at 50C, melts at 160C, and bonds well at 180-190C.
  • Insoluble in water, but it takes time can be speed up at higher temperatures, around 90c or so.
  • Less prone to bending, and more likely to break instead when put under stress.
  • Smells like cotton candy when heated for printing.
  • Mild bottom warping which can be reduced with a heated printing bed.
  • Sometimes harder to stick on the bed during the first few layers of print.
  • Require a bit more manual work to clean and maintain a printer nozzle after some use.
  • Sensitive to humidity, must be stored in a dry location.

ABS

  • Made of the same plastic material as you will find in LEGO.
  • Softens at 90C, melts at 180C and bonds strongly to itself at around 230C.
  • Insoluble in acetone, can speed up with boiling.
  • Bends rather than breaks, a lot sturdier than PLA when under stress.
  • Releases unpleasant non-toxic fume during print.
  • Very subject to bottom warping, curling and splits unless you have a heated bed and chamber.
  • Easier to clean a nozzle and printer bed with acetone.

I remind you again that these are only gathered from forums, second hand words from others with 3D printers out there. I have no way of confirming until I have my own printer and cramming out the details. But I think it brings out some valid things one should know about when working with a 3D printer.

Why I should choose or not choose PLA?

When it comes down to practical use and easiness to work with, I believe PLA is a clear favorite. There is a less chance for prints to fail due to bottom warping and splits. And it of course smells nice. My bedroom is next door to where I will put my printer (bad idea, I know) and I won't be bothered by the fume ABS would produce. The downside with PLA is it's sensitivity to humidity. If stored somewhere with a humidity is a problem (like the laundry room next door), it would render your whole exposed spool of PLA useless for printing after a while. But that should be in theory an easy fix: Don't store it where it is exposed. A second downside to PLA, which is the strongest counter argument in my case is the ability to do post processing on my prints. Mainly speaking sanding and painting. I've no idea how oil or water based or any other stronger chemicals would affect PLA. I'm a bit concerned it could melt my prints. And the same goes for sanding, due to the lower melting point of PLA (50c). Heat could be generated by the friction of sanding, and maybe make the plastic melt to a sticky substance and thus ruining the print.

Why I should choose or not choose ABS?

Bottom warping in the lower right corner
ABS plastic can withstand sanding and higher temperatures. It might be harder to paint on, but a simple primer should fix that. This makes ABS a very tempting choice. The smelly fume could always be fixed with a proper ventilation, but here is where the problem comes in. Despite ABS having a higher melting point, it is also more affected by temperature side effects. Mainly speaking expanding and contracting as the temperature rise or cools down. This is one of the main reasons why many ABS prints lose their adhesion to the printer platform and starts curving, also called bottom warping. And should you be lucky to not be affected by it, there is also a chance of splitting in taller prints. Some say it could be fixed in the software settings by adjusting the correct temperature, printing speed, layer thickness etc. And some say its unavoidable unless you have closed heated chamber to contain the heat until your whole print is done. 

Conclusion 

These are issues I hope I'm lucky enough to avoid. If I don't I will work it out and see what can be done to fix them. I hope I can stick with PLA if it proves to be sanding and painting worthy, or ABS if it doesn't warp too much. We will see when I have my printer.

More reading about differences between PLA and ABS:


-WJ

Wednesday, December 5, 2012

Project Corvo: 01 - Introducing Corvo Attano mask from Dishonored


For those who have played the game Dishonored, should recognize the main protagonist symbolic outfit  from the story. Without going into details about the game, the worn mask is inspired of a human skull made in metal combined with all sorts of steampunk technology and oddities. Needless to say its a strange mask, but cool in a fictional way. So what about it? I admit it's a bold statement to say, but I want to make a 1:1 scale replica of it, and that by 3D printing it.

The eye opener

I've only had one encounter with a real 3D printer once. I believe it was a Printrbot model, but it wasn't working or hooked up that moment. I managed to convince the students who had this mini showcase/workshop to give me one of their printed models of a whistle, cause I really wanted to have some kind of interaction with a 3D printer. This was over 9 months ago and back then and I didn't know so much about what kind of possibilities a 3D printer could offer, other than it looked cool. I didn't give it a much of a thought and lived my life as usual since. Not until I played Dishonored and by random chance stumbled on pictures of a real 1:1 size mask  from the game. I looked it up and it turns out the mask was almost entirely made from a 3D printer! Wow for reals? How? Who did it? More pictures surfaced, and even the work in progress was documented. This opened my eyes and brought back the spark to my hobby as a prop maker and cosplayer.


The original mask

The mask was made by Technically Magic Effects, an art studio based in New York City. I don't know anything about them other than they take on projects hired by various range of clients to make all kind of props, and in this case was commissioned by Bethesda (my bad, I just assumed it was since Betheseda made the game. But it was "Future US" who commissioned it as a part of a GamesRadar sweepstakes) to craft this mask along with other effects from the game for their marketing.
Now I'm familiar with the gesture of professionally made props hired or sponsored by game companies, as I see them regular at the large conventions. Hired models and actors wearing highly professionally made costumes to create blaze around their new game releases. Etc. But, the thing which caught my attention was the fact it was printed. A printed whistle is cool, but a video game replica? Much cooler!


Source: Official Techincally Magic Effects @ Facebook

The advantages of a 3D printer

A 3D printer in this case doesn't solve anything new. I'm sure a hand crafted mask, or any other prop would become just as good and decent quality if time and effort were spent well enough.
So what does 3D printing bring to the table?

Imagine maintaining the quality but still exceed in quantity, and potentialy in less time! 
In short, what if I I needed parts with exact same symmetry? Or more of the same part, and they need to be exactly the same? Instead of starting over again and redoing all the work and steps it took you to finish one piece, simply hit "print" again, and there it is, a second identical copy! And don't forget the blueprints are simply 3D object files and has the obvious advantages of digital media so you can pre-visualizer your prints, as well as shape, build, and sculpt your prints down to the tiniest details.

During my years of cosplaying and attending both large and small conventions, many of my props have had their share of wear and tear. And sometimes so grave I would resort on the fly repair with hot glue and other quick fixes. And starting over on a part have been discouraging because of the amount of work required, and there isn't a guarantee I will end up with an exact same part I need. However with a 3D printer I could make extras intended backup as well as be a great asset as a time saving tool which produces high quality accurate parts I need.


The goal

The Corvo mask is might be one of the first "big" projects I will attempt with a 3D printer. It's an ambitious project and it will be a decent challenge but a good one. I guess there will be a lot of trial and error and mostly wont be perfect, but it will give me good benchmark of capabilities it holds and what possibilities it opens for me on a later point and future projects. It's definitely a steep curve to learn and maintain a such tool but without a shadow of doubt rewarding once learned. Because of the handcrafted appearance of the mask, it should be quite forgiving if the prints doesn't turn out to be perfect, which could simply just add to the realism in the end, the only concern I actually have is if I should encounter some issues or shapes which cannot be printed. We will see.

So the goal of this project is to see how far I can take both me and the 3D printer. I will make the mask, but we will see if I can reach the same quality as the one Technically Magic Effects did.  Best way to start learning is to copy. TME did a great job of providing pictures and references on how they did it and how the mask should look like in the end.
Wish me good luck!

Remember to check the latest blog post for the most recent update on my progress!

- W


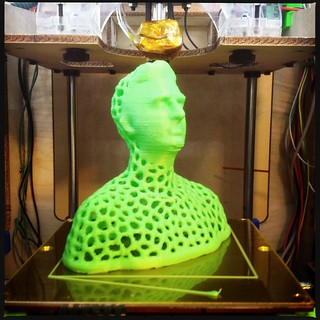
So far, so good on the latest update. Most of the small parts are placeholders and there is a ton of them still missing.

About myself


I'm that guy who walk the streets with my hands deep buried in my pockets any time of the year. I'm 26 years of age. My parents named me Wirat when I was born, and I've since taken a creative path to adolescence through creating stuff. And now upon creating this blog, to try my luck with creative use of 3D printing. As mentioned in my first entry, I wish to document my progress if it turns out to become a thing, and I wish to share my results and knowledge to any aspiring mind alike people out there! I know people like pictures, so I promise there are going to be lots of them!
So on to the juicy background story!

I've been working within the commercial industry for the past 5 years as a 3D generalist and VFX artist. Most of my job consist of product rendering, logo animation, stereoscopic advertising and motion graphics. Once in a while I'll do some basic VFX tasks such as rotoscopy, green screen and compositing. Working with 3D has been a passion of mine ever since I discovered and learned the ways of 3D in my earlier days at the uni.


Some of my 3D work throughout the years. Check out more at my Deviantart

My second and more recent passion have been in video game art with some borderline otaku nerdiness  such as cosplay and props making. This I cannot express how much of a joy I've had the past years of travelling around and visiting both small and large conventions dressed up and kicking grass at photoshoots and on the stage! That's something I'll keep doing and expand my capabilities as a cosplayer and prop maker by introducing this blog, along with my soon to arrive 3D printer.

Cosplays arranged from newest to oldest.

 I feel 3D printing is the natural next step for me since I come from a 3D artist background, and feel at home when making stuff. Either it be digital computer imagery or hand crafted things, like props and figures. In the long term aspect of the whole thing, I wish to be able to get my own workshop and keep on learning and making awesome stuff. Maybe even make a small extra living from 3D by offering my expertise and prints through etsy or ebay. If everything goes well expand that service independently. Who knows.

Anyways, Im going to wrap this section about myself for now and leave you with a small teaser about my hopeful project at the moment. Yes I wish to print this one beautiful day...

- W


More information about this project will be coming soon. Stay put <3

Sunday, December 2, 2012

Introduction to Yoshplay

Hi and welcome to yoshplay.blogspot.com!

In this entry I will just let you new viewers a know a bit what I have in store for this blog. Being the first post it isn't much to indulge into here yet, but I will say a few things about what you can expect to see.

My name is Wirat and as I'm writing this, I'm also counting the days for my 3D printer to arrive on my door. I ordered it as soon as yesterday, so I decided why the heck not start writing about it already now. And for those who stumbled in here without the prior knowledge of what exactly it is, it is as the name suggests.: A machine capable of printing things in 3D.

MakerBot Printed Owl Voronoi @Bre
Picture examples by jabllela (left) and John Bieheler (right) via Flickr.

I will write and share about my journey into the realm of 3D printing from a total newbie standpoint when it comes to printing in 3D. I have a 3D design background, which will be relevant and handy on my journey, but other than that, I've no experience when it comes to mechanical design, addictive manufacturing and similar. That means I'm more or less like most other people there when stumbling upon a new device; going to be clueless and need to learn by reading and experimenting.

Part of my blog will be about documenting my progress about learning using a 3D printer and as well as a  replica and prop design where 3D printing will become a great asset. I will try my best to be as informative as possible for those who are also curious about 3D printing and want to know more.
The other part of my blog will be a work progress blog. It's going to be less about printing, and more about what I do about my prints after they are done. So a lot of focus on post working on prints and props in general to make them be replica worthy.
I've stumbled upon blogs about 3D printing, and blogs about prop making, but not many who covers both. So I hope I can bring something new and fresh on the table. And I hope people will find it interesting enough to follow my progress.


Well I'm going to wrap it up for this time. In meanwhile check out one of my favourite 3D print video so far!

- Wirat


A sandstone block built from lego, blending real objects with 3d prints from Greg Petchkovsky on Vimeo.